


Applying press-on nails is simple when you follow the right order: prep your natural nails, choose the right size for each finger, decide between adhesive tabs or glue, press each nail down firmly, and keep your hands dry right after application. When done properly, press-ons can give you a salon-like manicure at home without the time, cost, or repeat filing that usually comes with salon appointments.
That is exactly why more people are turning to press-ons. They are faster, easier to change, and far more beginner-friendly than many people expect. At Reya Nails, the goal is not just convenience. The brand leans into handmade, salon-like, reusable, and better-for-natural-nails positioning, which makes this kind of at-home manicure feel more elevated and less disposable.
Jump Links
Why Apply Press-Ons • What You Need • Step-by-Step Guide • Glue vs Tabs • How to Make Them Last • Are They Better for Natural Nails? • Common Mistakes • Top Reya Picks • FAQ • Related Reads • References
 Why is learning proper press-on application worth it?
Because press-ons are no longer just a beauty shortcut. They have become a real category in their own right. For shoppers, the appeal is obvious: you get a polished manicure faster, you can swap styles more easily, and you do not need the repeated salon upkeep that often comes with acrylics or hard gels.
For Reya Nails, that value goes a step further. The brand emphasizes 100% handmade sets, a salon-like look, reusability, and beginner-friendly wear. That combination makes press-ons feel less like a temporary fix and more like a flexible beauty routine that still looks elevated.
Useful internal links for this article:
What do you need before applying press-on nails?
You do not need a complicated setup. Most beginners only need a few basics, especially if they are using a kit from a brand like Reya that already includes the main tools.
| What you need | Why it matters |
|---|---|
| Press-on nail set | The nails themselves, already shaped and styled |
| Nail file | Helps refine the edge or fit if needed |
| Alcohol wipe | Removes oil before application |
| Orange wood stick | Pushes back cuticles and helps with gentle removal later |
| Adhesive tabs or nail glue | Tabs for shorter wear, glue for longer wear |
| Clean, dry hands | Moisture and oils shorten wear time |
If you are new to press-ons, using a complete set makes the process easier because you are less likely to skip an important prep step.
How do you apply press-on nails step by step?
Step 1: Start with clean, fully dry nails
Wash your hands, dry them thoroughly, and make sure there is no lotion, cuticle oil, or leftover polish on the nail plate. Clean prep is one of the biggest differences between press-ons that last and press-ons that lift too early.
Step 2: Push back the cuticle gently
Use a wood stick to push the cuticle back just enough to clear the nail plate. Do not overdo it. You want a cleaner surface, not irritated skin.
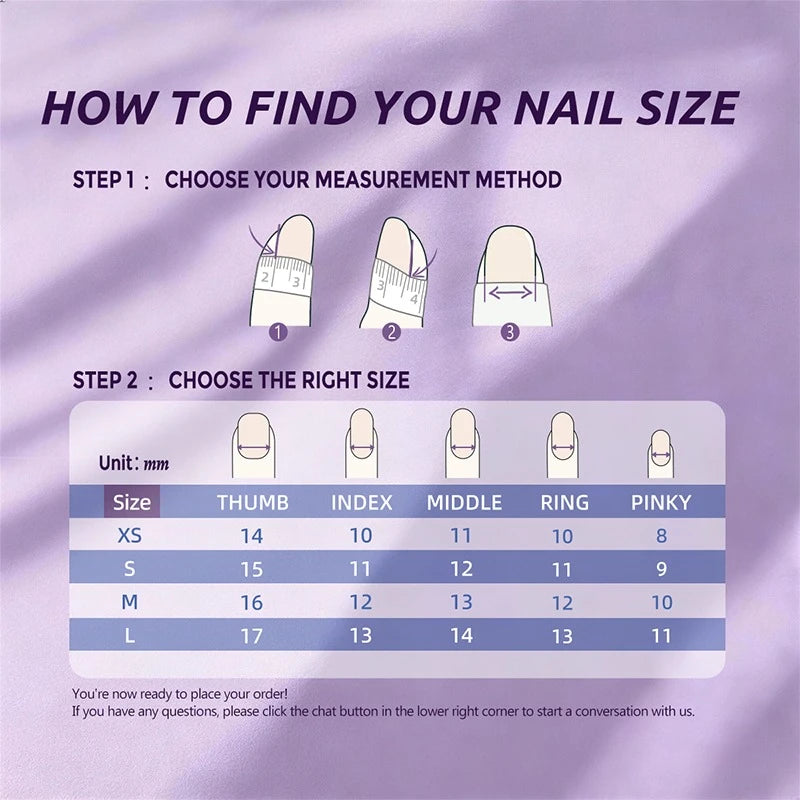
Step 3: Size every nail before opening glue
Lay out the nails and match each size to each finger first. If you are between sizes, it is usually better to choose slightly larger and lightly file the edge for a better fit. This is one of the easiest places to make your application look more natural and more salon-like.
Need help here? Use Find Your Nail Size.
Step 4: Lightly buff and remove surface oil
A very light buff removes shine from the natural nail so the adhesive can grip better. Then wipe each nail with alcohol to remove oils and dust. The goal is not to thin your nails. It is simply to create a cleaner surface.
Step 5: Choose between glue and adhesive tabs
Before you start applying, decide how long you want to wear the set. Tabs are better for short-term wear and easy removal. Glue is better if you want a longer-lasting hold.
Step 6: Apply one nail at a time
If you are using adhesive tabs, apply the tab first, smooth it down, then peel the top film. If you are using glue, use a small amount instead of flooding the whole nail. Align the press-on at the cuticle area, then lower it into place.
Step 7: Press firmly
Hold each nail down firmly for about 20 to 30 seconds. This is one of the simplest but most important steps. Rushing this part often leads to early lifting.
Step 8: Keep your hands dry afterward
Avoid water for at least the first two hours after application. That gives the adhesive time to set properly and helps improve wear time.
Should you use nail glue or adhesive tabs?
This is one of the first questions beginners ask, and the answer depends on how you plan to wear the set.
| Application method | Best for | Typical wear direction | Main trade-off |
|---|---|---|---|
| Adhesive tabs | Weekend wear, events, photos, testing a style | Shorter-term wear | Easier to remove, lighter hold |
| Nail glue | Daily wear, travel, longer-lasting manicures | Longer-term wear | Stronger hold, slower removal |
For most first-timers, tabs feel less intimidating. For people who want their manicure to last longer, glue usually makes more sense. A practical way to phrase it is simple:
- Choose tabs for flexibility and lower commitment.
- Choose glue for stronger hold and longer wear.
How can beginners make press-on nails last longer?
If you want your press-ons to stay on well, the basics matter more than hacks. Most long wear comes from clean prep, accurate sizing, and not exposing the nails to water too soon.
- Size every nail before you begin
- Remove oil completely from the nail plate
- Press each nail firmly for the full 20–30 seconds
- Avoid water for at least two hours
- Wear gloves for cleaning or dishwashing
A small extra tip that feels especially useful for beginners: after application, a few seconds of gentle low heat can help support adhesion. Just keep it brief and controlled.
Are press-on nails better for natural nails than salon acrylics or hard gels?
They can be a gentler option, but that depends on how you apply and remove them. The strongest and most believable version of this claim is not that press-ons are automatically harmless. It is that they can be better for natural nails when prep is gentle, removal is patient, and you are not ripping them off.
This is where Reya’s positioning works well: the brand can naturally emphasize that its handmade press-ons offer a salon-like look without constant salon visits, that they are reusable, and that they are more approachable for beginners who want a polished manicure without harsh maintenance.
If you also want safe removal guidance, link here: How to Remove Press-On Nails Safely.
What usually makes press-on nails pop off early?
Most early lifting comes down to prep, moisture, or fit. The usual mistakes are predictable:
- There is still oil, lotion, or cuticle product on the nail plate
- The press-on is too small or too wide
- You touched water too soon after application
- You used too much glue or too little
- You used your nails as tools immediately after applying them
Most of the time, the problem is not the press-on itself. It is one skipped step at the beginning.
Top Reya Picks for Beginners
If you are writing this article to rank and convert, it helps to recommend styles that feel easy to wear, not just pretty in a product grid. For beginners, designs that look polished without being visually heavy tend to work best.
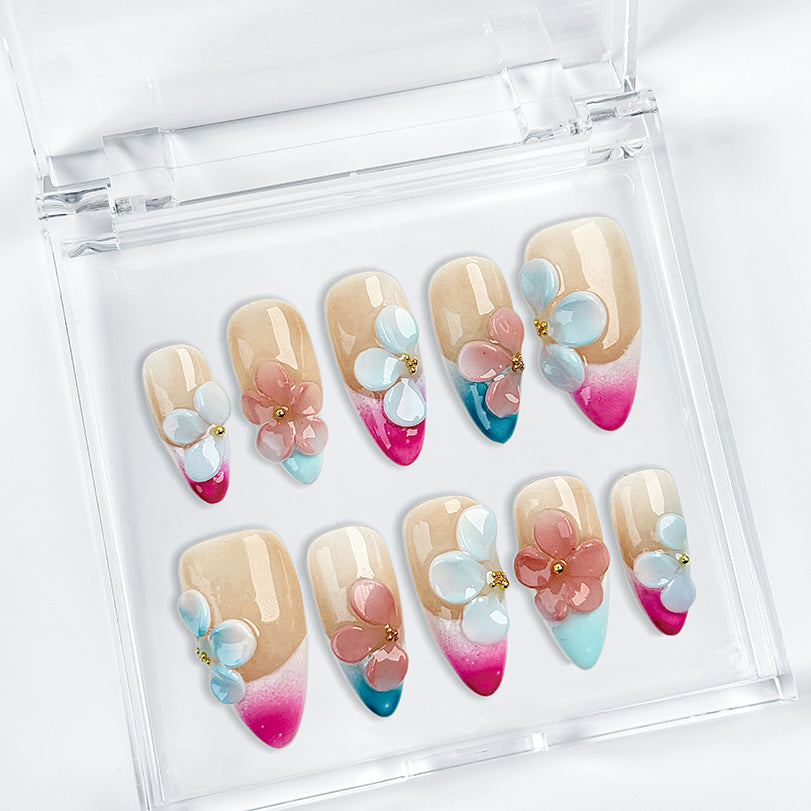
Pastel Tide
A soft, wearable style that feels beginner-friendly and easy to pair with everyday looks.
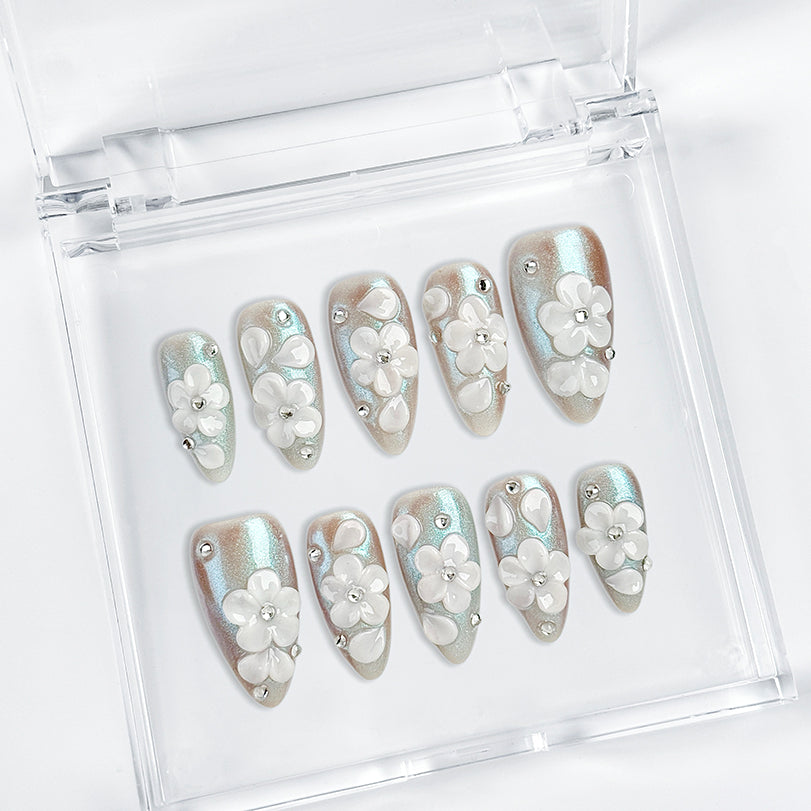
Icy Bloom
A clean, salon-like design with a polished finish that still feels easy to wear.
Best Sellers
A good place to start if you want to browse the most popular handmade Reya styles first.

That product mix also supports the brand story naturally: handmade, salon-like, reusable, and beginner-friendly without sounding forced.
Frequently Asked Questions
How long do press-on nails last?
That depends on prep, adhesive choice, and aftercare. In most cases, tabs are better for shorter-term wear, while glue is better for longer-lasting wear.
How long should I press each nail when applying press-ons?
A good rule is about 20 to 30 seconds per nail. Rushing this step is one of the easiest ways to reduce wear time.
Can I shower after applying press-on nails?
It is better to avoid water for the first two hours after application so the adhesive has time to set properly.
Are press-on nails safe for natural nails?
They can be a gentler option than repeated salon acrylic fills when you prep gently, remove them patiently, and do not force them off.
What is the biggest mistake beginners make?
Usually it is one of three things: skipping nail prep, using the wrong size, or getting the nails wet too soon.
Should I use glue or adhesive tabs?
Use tabs for shorter wear and easier change-outs. Use glue for stronger hold and longer wear.
Can handmade press-on nails be reused?
Yes. With gentle removal and proper storage, handmade press-ons can usually be worn again.
What should I do if I get irritation from glue or adhesive?
Stop using the product, avoid further exposure, and review which product touched your skin. If symptoms do not improve, seek medical advice.
Related Reads
Suggested cluster articles to interlink (replace with live URLs if needed)
References
- Reya Nails — Homepage and brand positioning
- Reya Nails — Tutorials
- Reya Nails — Find Nail Size
- Reya Nails — Nail Removal Process
- Reya Nails — Best Sellers
- Reya Nails — Pastel Tide
- Reya Nails — Icy Bloom
- FDA — Nail Care Products
- American Academy of Dermatology — Healthy Nail Tips
- American Academy of Dermatology — Tips for Reducing Artificial Nail Damage
- American Academy of Dermatology — Manicure and Pedicure Safety
- NHS — Contact Dermatitis Causes
- British Association of Dermatologists — Artificial Nails Warning
- Grand View Research — Global Press-On Nails Market Size & Outlook
